Operating a campaign to prevent or end enemy air power is an extremely effective way to help your team win. The team with air superiority keeps airplanes and tanks longer resulting in faster sector taking and more efficient use of Command Points. Done right, the player camping AAC Airfield will also cause strong BLUFOR players (those with the experience to be pilots and SpecOps) to waste a large amount of Command Points on airplanes and helicopters that get destroyed.
Why Special Operations At The Enemy Airbase Are Worth The Effort In ArmA III Warlords
The outcomes of successful SpecOps at AAC Airfield are:
- Longer life for OPFOR Tanks and Airplanes/Helicopters
- More efficient use of CP by OPFOR
- Waste of large amounts of CP by good BLUFOR players
As with any operation behind enemy lines the most important goal is to stay alive so that you can get the most out of the effort of getting there. It generally gets harder to get behind lines as the game progresses.
Moving a player behind enemy lines is an expense for the team. Expenses include:
- The transport vehicle
- The higher cost to resupply (either “Your Location” drops or missions by another player)
- The loss of that player as a sector attacker
- (Optional) The command points needed to call in and outfit a squad of AI
- (Optional) The command points needed to outfit the player with stealth equipment & launcher
Prime Locations
There are several location options for camping AAC Airfield and each has strengths and weaknesses.
Locations I consider are:
- North of the airfield (within 1.5k)
- South of the airfield (within 1.5k)
- Southeast of the airfield on the northern slope of the peninsula
- Rodopoli docks (assuming OPFOR controls the sector)
North of The Airfield
Area of Operations / Map
Strengths
- Easy evasion of counterattack
- Good resupply security / secrecy
Weaknesses
- Limited effectiveness when airplanes land northerly and take off southerly
- Limited visibility to the runway and sector
Getting There
- Helicopter from the North
- Attack boat from Pyrgos area
Jeff’s Squad
- 1 x Heavy AT
- 2 x Missile Specialist AA
- 1 x Sharpshooter
- Jeff with stealth sniper
South of The Airfield
Area Of Operations / Map
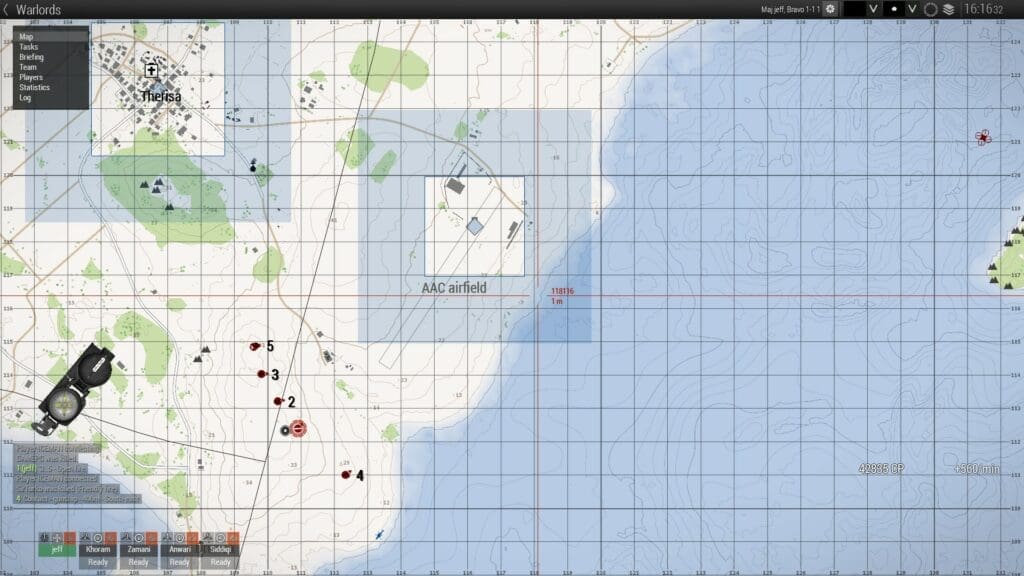
Strengths
- Excellent visibility to the airfield & player spawn
- Effectiveness against all landing and takeoff directions
- Effectiveness against armor landing or arriving at AAC
- Effectiveness against static launcher placed at AAC
Weaknesses
- Poor security / secrecy
Getting There
- Helicopter to Northern Slope Landing Zones
- Helicopter to shoreline south of Theresa
- Optional vehicle from helicopter landing zone
Jeff’s Squad
- 1 x Heavy AT (for defense)
- 2 x Missile Specialist AA
- 1 x Sharpshooter (for defense)
- Jeff with stealth-sniper
Northern Slope
Area Of Operations / Map
Strengths
- Visibility to all takeoffs and landings
- High security and secrecy
Weaknesses
- Long firing distance provides time for pilots to evade
- Lack of visibility and firing options to player spawn
Getting There
- Helicopter to the mountains
- Attack boat from Pyrgos area (or further south)
Jeff’s Squad
- 1 x Heavy AT (for defense)
- 3 x Missile Specialist AA
- Jeff with stealth-AA
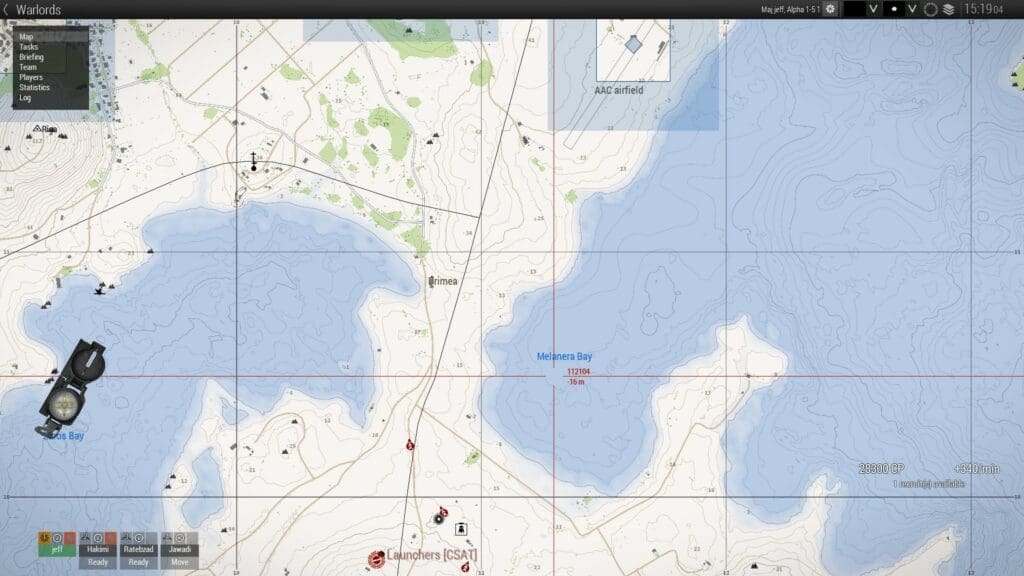
Rodopoli Docks
Area of Operations / Map
Strengths
- Resupply is easy and secure
- Ability to use static AA launchers
- Travel to the area of operations
Weaknesses
- No visibility to the airfield or northerly landings
- No visibility to player spawn
- Poor defensive position due to limited manpower for a single player
Getting There
- Fast travel to seized sector
Jeff’s Squad
- 1 x Heavy AT (for defense)
- 2 x Missile Specialist AA
- 1 x Sniper (for defense)
- Jeff with stealth-AA
East Island
Area Of Operations / Map

Strengths
- Visibility is good for air assets and armor
- Firing position is good for air assets
- Secrecy of approach is good
Weaknesses
- Defense against counter attack
- Firing position against players spawn is limited
- Resupply is difficult as launchers and AI can spawn in on the mainland north of AAC
Getting There
- Attack boat from Pyrgos area (after truck ride if Pyrgos isn’t captured yet)
Jeff’s Squad
- 1 x Heavy AT (for defense against boats)
- 3 x Missile Specialist AA
- Jeff with stealth-AA
Preparing Your Squad
You might consider the following when choosing the makeup and gear of your squad:
- Where are you going
- How much CP do you have to invest
- Is it day, evening, night, morning
- What is the best transport option for the in-game situation and your skill level
- Will you operate with a team or on solo
- Are you traveling alone and calling in the squad later or transporting your squad

Once you have considered these and chosen the squad makeup you want to operate with, here are some ideas:
- I always have at least one AI squad member because AI are excellent spotters
- If the time of day is evening or night then special operations suits (anti-thermal gear) is best for the whole squad
- A laser designator (and the battery) are helpful if you want to direct air power to destroy something at AAC and you will have visibility to that zone at your chosen area of operations
- If you can operate in the AO near a vehicle then load it up with the gear you want to have on hand using the Arsenal Hack and, once you arrive, leave an AI in a non-driver seat so it doesn’t despawn
- If you can slingload a box from a helicopter, load the box up with the gear you want using the Arsenal Hack
- If transportation is risky due to the game situation (i.e. BLUFOR has air superiority) or your experience level, consider calling in your squad after you arrive
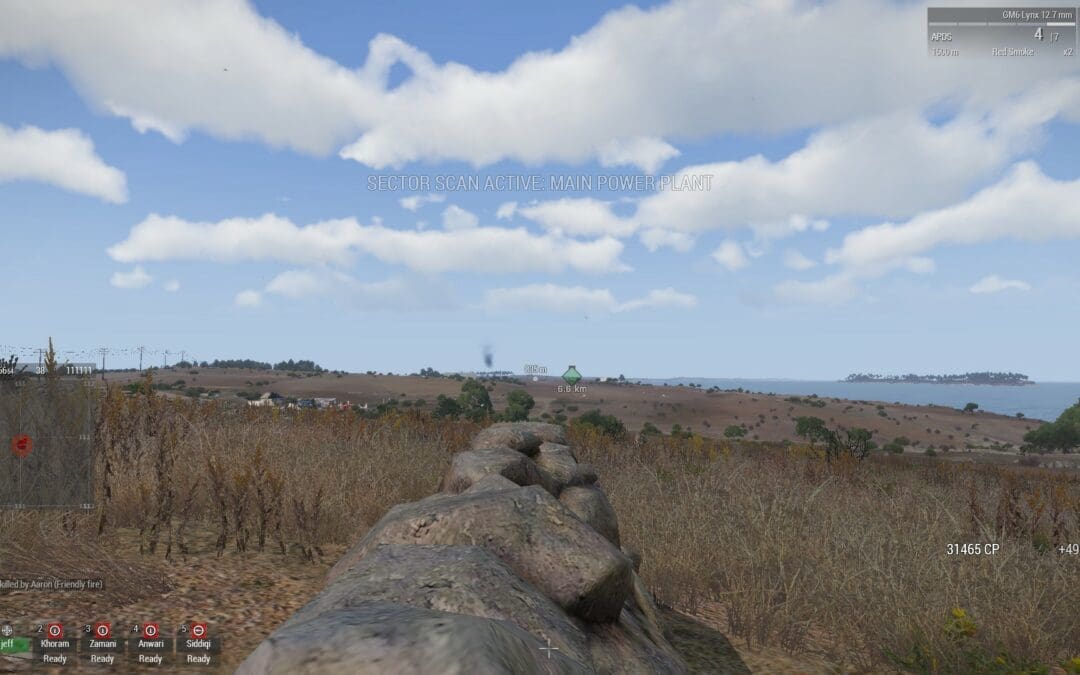
Causing Mayhem & Managing Your Squad
Once you are at the area of operations your goals are:
- Stay alive
- Wreck expensive stuff
I start by placing everyone on Hold Fire, get them positioned where I want them, and Mark the map with their position/number so I can remember who is where.
Next I command the engagement direction (engage), level of awareness (typically to Combat), and stance.
Finally I set a single AA soldier to Open Fire so that air assets will be engaged and I get in position to fire as well.
Air assets are more valuable once they take off because they have players and AI in them. As long as you can take one down on takeoff, shoot on takeoff.

Whenever I take a shot I move, but u generally do not move AI ok every shot. The reason I move is that experienced players know to look at the map when they are killed to see the location of the player that shot at them. By moving, I stay alive longer.
When CP allowes it I order in 2 or 3 launcher crates on my position. Sometimes I move to a more secure location before calling them in. Keep in mind, bring right next to the create is highly advantageous since you can switch gear quickly based on what you want to shoot. In this way I can play both sniper and AA and AT for my squad.
As an AI runs out of rockets (they have 3) I place them on Hold Fire (I don’t want them shooting their rifle) and plan to replace them with a fresh airdrop at a later time (based on security, position, and rockets on hand). I also set the next unit to Open Fire.
Resisting Counterattack & Staying Alive
Since the most valuable aspect of operations behind lines is the position you have earned starting alive to fight is critical. It is better to run from a legitimate threat and rebuild once you have attained security than to die and have to invest the time and CP in getting to that position again.
When I face counterattack I have to make a decision: resist or retreat.
Counterattacks are typically a single experienced player driving armor in from another zone or a single experienced player that spawns in to the zone and attacks on foot, working to sharpshoot your team.
If I’m going to resist I typically do the following:
- Set my AT and Sharpshooter to Open Fire and direct them on targets. Get my AA units in to prone position so that they have a possibility of surviving
- Take a few shots with my sniper rifle (assuming I have it and this is a player on foot) and then displace to a secure position
- Direct my squad as the situation dictates to defend themselves
- If we survive I move my squad and update map markers so we are harder to find for another attack
- If the squad gets wiped out, I bring in a new squad and deploy them based on what I faced in the first counterattack
- Pull in AT resupply box for my AT guy and myself if I’m now low

If I’m going to retreat I try to save my squad by getting them to secure positions ASAP once the counter attack is identified. Typically some number of units will be taken out. Once the counterattack is over I redeploy.